Click the start menu, and click on Control Panel.
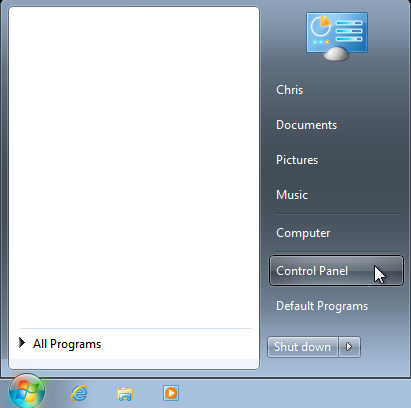
Depending on your set up, you will see something that looks like this:
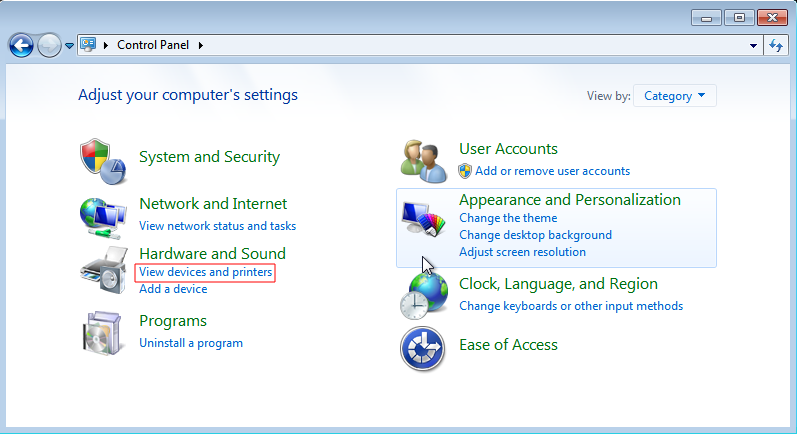
or
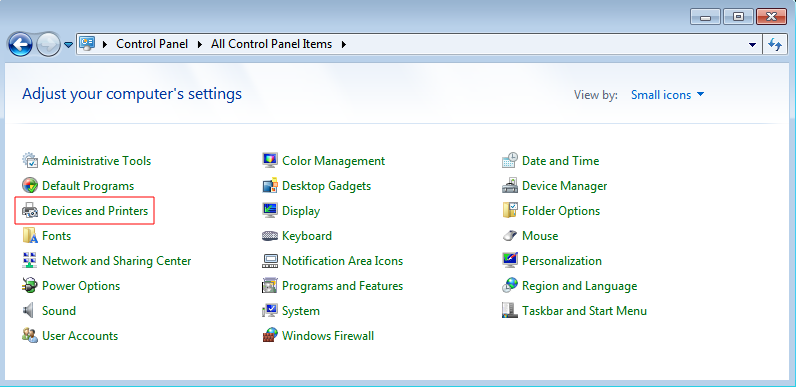
If it looks like the first image, click View devices and printers, which can be found under the Hardware and Sound category. If it looks like the second image, click Devices and Printers.
Right click the printer to share, and click Printer properties.
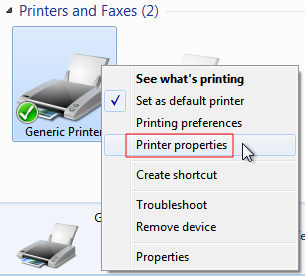
(Note that here, we are using the generic printer as an example. Yours will be the name of the label printer, for example Zebra GK420d. App printers will have the same menus)
Click the Sharing tab.

Tick the Share this printer checkbox, and give it a name, something like LabelPrinter or LabelPrinter01. Note that this name is unrelated to the Printer's own name. Please don't use spaces or symbols as this can cause problems.

And Click OK.
With the printer shared, we now need to tell Windows to let the PI connect.
To do this, click on Control Panel in the Address Bar
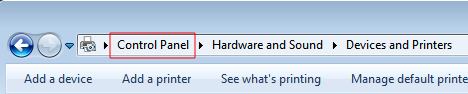
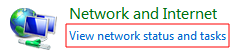
and depending on your setup, either click View network status and tasks which is under Network and Internet
or click Network and Sharing Center

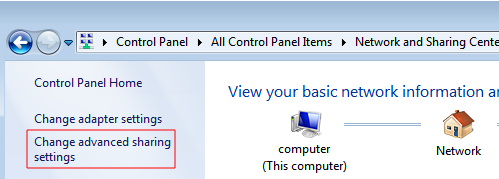
Click Change advanced sharing settings, which can be found on the left.
It gets a little trickier here. This is split into sections, usually named things like "Home or Work" and "Guest" or "Public". Each section needs to be expanded in turn, then file and printer sharing set to on, and password protected sharing set to off.
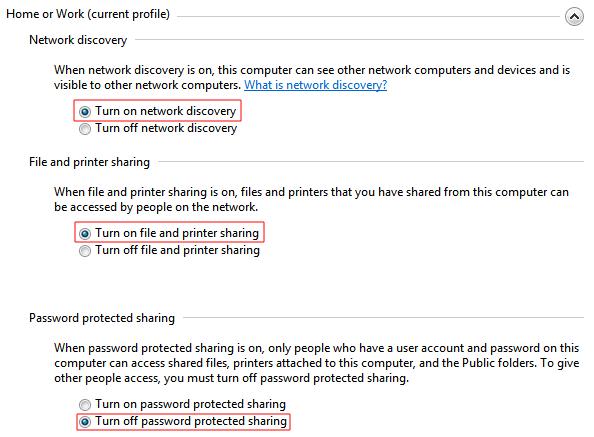
Finally, click Save changes.